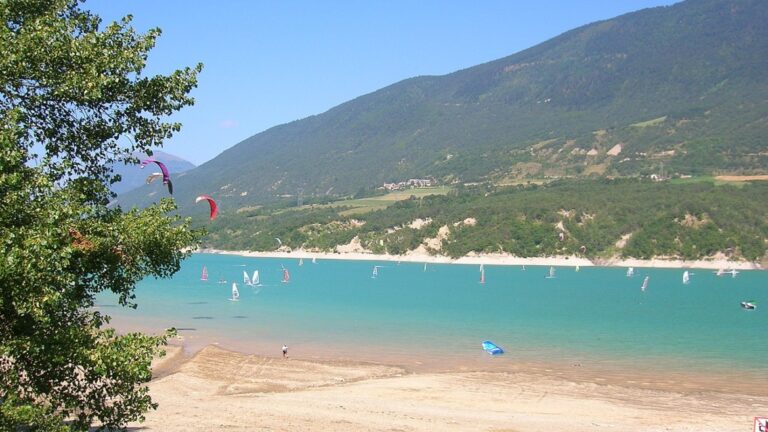
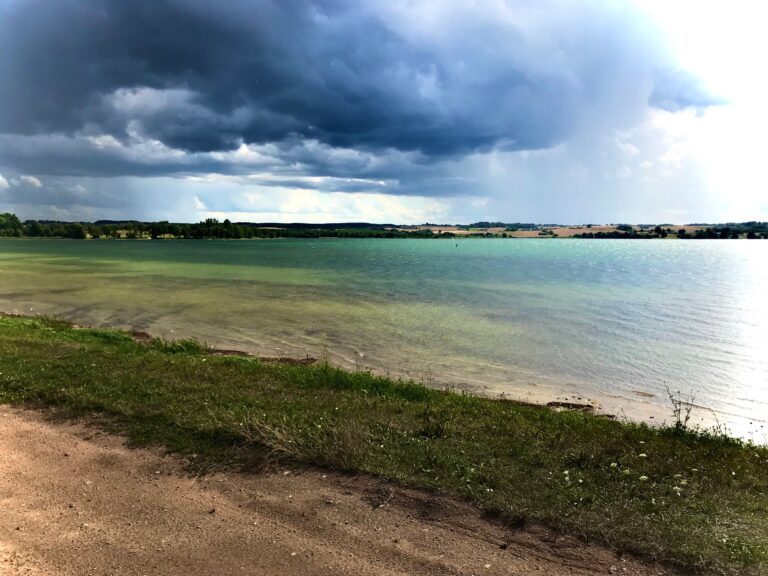
Lac de Monteynard-Avignonet is a man-made reservoir located in the Isère department of southeastern France. It’s known for its scenic beauty and is a popular destination for various water sports, (read more…)
This is the wing foil guide. On this page, you will find all information you need to learn, grow and make decisions related to wingfoiling. We go into the basics, the history, tips and tricks, tutorials, learning how to fly, where to go, how to travel and so much more. Every subject described here links on to another page with more information about the subject, so you can do as many deep dives as you want!
On this page:
- Getting started with wingfoiling
- What is wingfoiling
- Getting started: equipment
- Wingfoil brands
- Beginner equipment
- Equipment maintenance tips
- 3 tips before you get in the water
- How to handle the wing
- Where to place your mast and foil on the board
- Wingfoil lessons
- Wingfoil guide: getting started with your first flight
- Learning how to pump
- Learning how to jibe
- Wingfoil guide: the importance of the right gear
- How to avoid beginner mistakes
- How to choose between a rigid and inflatable board
- Travelling with your wingfoil equipment
- How to carry your gear, get in and out of the water safely
- Wingfoil safety tips
- Riding heelside or toeside in wing foil
- Riding in low wind
- Riding in strong or gusty wind
- Where to go wingfoiling
- Wingfoil gadgets

Getting started with wingfoiling
Wing foiling is a great watersport for body and soul. Do you want to learn more about getting started with wingfoiling?
Welcome to this comprehensive wing foil guide on getting started with wing foiling! If you’re new to this exhilarating water sport or looking to enhance your skills, you’ve come to the right place. In this guide, let’s will walk you through the essential steps, techniques, and equipment needed to embark on your wing foiling journey.
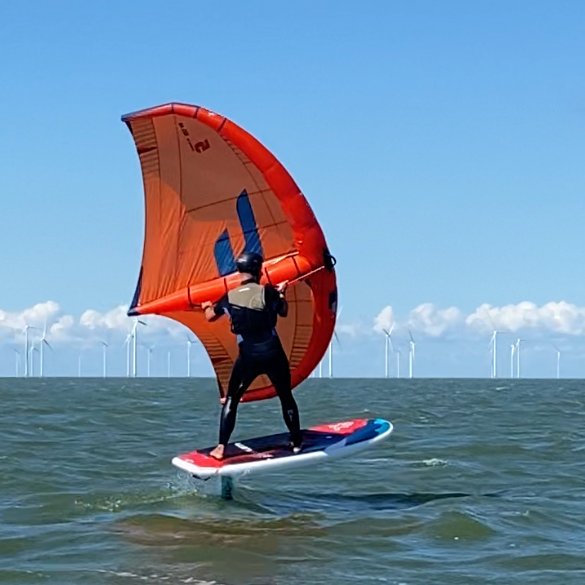
What is wingfoiling
Wing foiling, also known as wing surfing, is a thrilling combination of windsurfing, kitesurfing, and stand-up paddleboarding. It involves using a handheld inflatable wing, similar to a small kite, to harness the power of the wind and glide across the water’s surface on a hydrofoil board. The unique design of the hydrofoil allows you to soar above the water, providing an incredibly smooth and exhilarating ride. Read more about the history of wing foiling or see all you need to know about wingfoiling. Read on to learn more in this extensive wing foil guide or check out the wingfoil FAQ for many answers!
Getting started: wing foil guide – equipment
Wing
The wing is the primary component of wing foiling. It consists of an inflatable leading edge, handles, and a rigid frame.
When choosing a wing, consider your skill level, local wind conditions, and personal preferences. Opt for a wing with a suitable size and design that matches your abilities and the wind conditions in your area.
Board
A hydrofoil board is specifically designed for wing foiling. It features a long mast with a hydrofoil attached beneath the water’s surface.
The hydrofoil creates lift, allowing you to ride above the water and experience a smooth, gliding sensation. Make sure to select a board that suits your weight, skill level, and the conditions you’ll be riding in.
Foil
The foil is the piece of equipment thats connected underneath the board. It consists of a mast, a fuselage, a front wing and a stabiliser.
There are different types of foils, basically divided into high aspect and low aspect foils.
Wingfoil brands
There are a lot of wingfoil equipment providers out there. The wingfoil market is vibrant and rapidly evolving. With the growing volume of people discovering wingfoil, the number of wingfoil equipment manufacturers also increases. Established players like Ocean Rodeo have expanded their well-respected water sports lineups to include wingfoiling, focusing on durability and safety. They bring years of experience and a commitment to quality, appealing to both seasoned riders and beginners. Brands like Ensis and Airush, known for their innovation and performance-oriented designs, are pushing the boundaries in wing technology and usability. They offer products that blend cutting-edge technology with user-friendly features, making wingfoiling accessible to a broader audience.
Some of them have been around for years, like Naish Wingfoiling which was founded by legendary windsurfer Robbie Naish. But also brands like North and F-One have been there from the start of the sport. Some of the brands are high-end focused like Ensis, some of them are more based on accessing a broader audience with more accessible prices like Gong.
Discover the most well known, maybe even the best wingfoil brands here.
Beginner equipment
Beginner equipment is very important when you start your wingfoil journey. When you are beginning, you should be looking for a set of equipment that allows you to learn and to progress. What this means is: you want a big, stable board to stand on. A board that offers stability so you are not focused on maintaining balance, but you can focus on learning to sail with the wing and learning to fly with the wing. Look for a board that’s over 30 to 40 litres of your own weight. If you are 80 kilos, look for a board of 130 liters.
Also you want a beginner foil. This means a low aspect foil: a big, round foil. Not one that looks like a kitchen knife which would be a high aspect foil (more about low-aspect and high-aspect foils). A low-aspect, beginner foil would be between 2100 and 2400 cm2 of surface for that 80 to 90 kilos rider. What a low-aspect foil allows you to do is to fly at low speeds, which is what you need. Low speed flying at wingfoil is spectacular enough when you are a beginner. This foil will allow you to make mistakes and keep flying through it.
Read more about wingfoil equipment for beginners.
Maintenance of equipment
Maintaining your wingfoil equipment is like taking care of a good friend. After each fun session on the water, give your gear a gentle rinse with fresh water to wash away the salty stuff. Dry it well using a towel before keeping it safe. Check for any scratches, tears, or loose parts, and tighten any screws that might be feeling a little loose. Remember, your wing, foil, and board like to be dry and cozy, so store them in a cool, shady place. If you’re not sure about something, ask someone who knows, or even better, a professional. By looking after your wingfoil gear, you’re making sure it’s always ready for more awesome rides!
Discover 10 practical tips for maintaining your equipment.
3 Tips before you get in the water
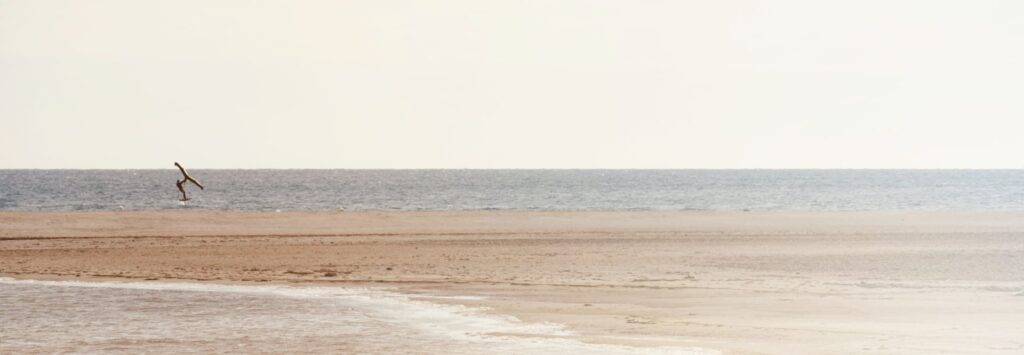
1. Start on the beach
Take your wing in your hand, and fly it on the beach. Get used to the movement, the power and the reaction to what you do with your arms and hands.
This will give you an enormous benefit once you get into the water. You build up some muscle memory and you feel comfortable before getting wet.
2. Be warm
In the first couple of sessions, your body will do things it probably is not used to.
A good warm-up of your arms, back and legs will do your body a big favour. Do some push-ups, some squats and turn your arms in the air. It may not seem cool, but if will definitely help you.
3. Look around you
Make sure you are aware of where you are.
Where does the wind blow to and what direction will you drift off to? Can you walk back from there? Just make sure you are aware of your surroundings.
See more safety tips for wing foiling.
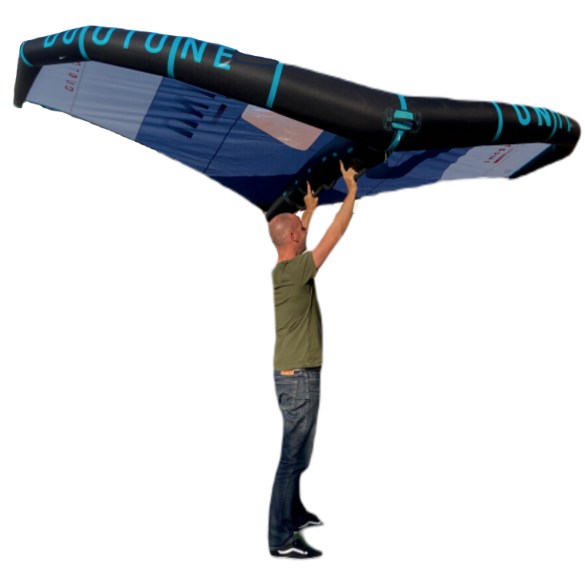
Wing foil guide: How to handle the wing
A big part of your wing foil success depends on the ability to handle the wing. It’s a very good idea to learn how the wing works, and how to handle is, before getting into the water. While standing on the beach, inflate the wing and grab it from the central handle. This is the handle in the middle of the front of the wing, where your leash is connected as well. Holding the wing from the central handle (also called “downwind handle” on some wings), allows you to walk around with the wing, while it’s peacefully hanging in the air.
From there, grab the first handle on the central strut and then grab one of the handles towards the end of the strut. You will note that the wing becomes more power from the wind, as soon as you pull the second hand closer to your body.
This is just a brief summary for this wing foil guide. It’s all explained more in depth on how to handle the wing.
Learn controlling the wing on dry land
Learn to handle the wing before getting into the water. It allows your muscle memory to build up.
It also allows you to focus on controlling the wing.
You learn to control it before you have to deal with the board, the waves and everything else you have to cope with when you are in the water.
Wing foil guide: Tips on where to place your mast and foil on the board
Once you have the wing controll in your system and you are ready to go out there, you can mount your gear. The wing is an important piece of equipment of the wing foil gear. The wing represents one source of power that brings you forward on the water. Other sources of power are the waves and the power that comes from pumping the foil.
The other key piece of equipment is the board, and with that comes the mast and foil connected to it. The foil is connected via the mast to the bottom of the wingboard. Normally, the foil is mounted in a rail which allows you to move it more forward or more towards the back of the board.
It’s important to know where to place the mast on the board. Too far to the back and the board wants to rise too much. too far to the back and it will not fly at all.
Where to place the mast and foil on the board depends on a number of factors:
- Your level
- Your body weight
- Your weight distribution
- The local circumstances
- Your objective
Read out tutorial on where to place the mast and foil here.
wing foil lessons
Wing foil is a unique sport that gives you a thrill not a lot of activities can give you. But since it’s such a particular type of sport (it combines foiling with surfing with sailing), it’s a good idea to start off with some lessons.
This may shorten your learning curve, allowing for quicker wins and a fast experience of success.
There are many schools out there where you can learn how to wingfoil.
Typically, in 5 to 10 lessons, you get the basics in your system and you will start to do your first flights.
Different schools have different strategies to teach you how to wingfoil. Some start by towing you behind a boat so you get on the foil first.
Other start by teaching you how to manage the wing and then they put you on a big board so you learn how to sail it. After that, you move to getting on the foil.
Before committing to a pack of wingfoil classes, consider asking some questions.
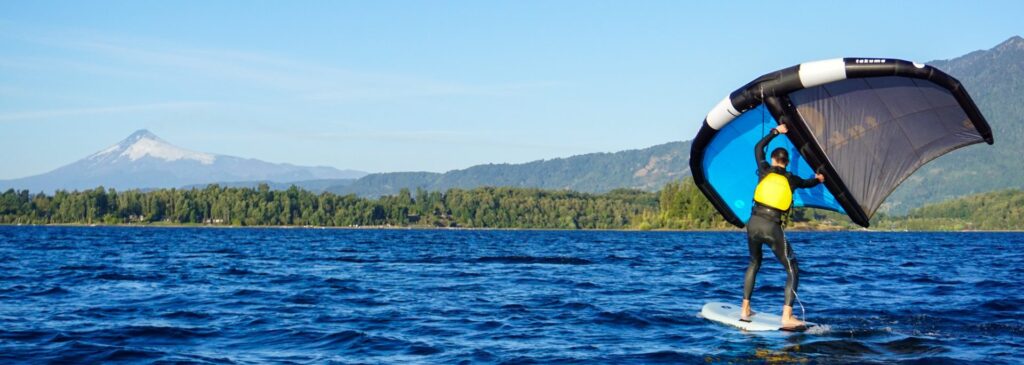
Wing foil guide: getting started with your first flight
In wingfoiling, the process of getting out of the water and making the board ride on the foil is called “take-off”. Once you are completely out of the water and experiencing the thrill of flying above the water, it’s called “flight”.
Let’s take a look at the basics of how to get on your first flight or learn everything you need to know about learning how to fly in wingfoil.

Start on your knees

Stand up and taxi

Pump and fly away

Start on your knees
Turn the board perpendicular to the wind and let the wing rest in the water in the way that the centre strut is in the direction of the wind. Sit on your knees, facing the wing and with the wind in your back.
Now get on your knees and let the wind lift up your wing. Once you’ve done this, you will see that the wing starts to gain power and your board starts to move. This movement gives you stability to go to the net step.
Stand up, start taxiing
As soon as you get some wind in your wing, you will notice the board getting a bit of speed. This is the moment you can stand up, as the forward movement gives you stability.
Stand up and let the board speed up. This is called taxiing, like an airplane that on the runway that does not fly yet. Check the position of your feet, make sure they are in the middle of the board.

Take-off (get on the foil)!
In order to take off, make sure your feet are on the center line of the board. The flatter the board lies in the water, the faster it will go and the easier it is to take off.
Turn downwind a little bit and let the wind speed up your board. Use pumping technique if you notice there is not enough windspeed to make your board want to fly. Lift the weight off your front foot and you will see that your board starts to fly on the water.
You are foiling!!
Stabilise your flight and enjoy
As soon as you are out of the water, your board meets hardly any drag from the water. That’s why it will speed up considerably and that’s why it will try to “take off” more. This can scare a bit at first, but you will get used to it soon enough.
You need to do two things now:
- Push the front down in order to remain flying and not breach the water with the foil.
- (if you are a beginner): De-power the wing so you can relax, instead of being overcome by the speed. The more relaxed you are on the board, the better you are flying.
More about learning how to take off in wingfoil.
More about how to maintain a longer flight.
Learning how to pump
An essential part of the wing foil guide and wingfoiling technique is to learn how to pump your board out of the water and get on the foil. It’s this technique that allows you to fly on your wingfoil board with relatively low wind. During the pumping, you generate more wind and power, which translates to speed and momentum. As soon as you are out of the water, the board loses it’s drag from that water. Therefore it needs less power to keep flying. This allows for wingfoilers to ride so often, even if there’s relatively low wind.

Pumping is an interconnected and circular motion of your arms, coordinated with a pumping movement of your legs.
The coordination of both movements ensures that the board speeds up, lifts up, speeds up again, lifts up again and this way gets pumped out of the water.
As soon as it’s out of the water, you want it to level off. Push down on your front leg and you will see that the board flies off.
Learning how to jibe
Once you are up and riding, you have learned how to pump and you are actually flying, you are ready for the next step in the long learning curve that’s called wing foiling. You probably land on the water before every time you want to turn and go back to where you came from. This means you stop flying, you land on the water, you turn while taxiing and you have to get back on the foil again.
If you learn how to jibe in the air, you can stay on the foil, so flying, while making that turn. This means you can do continues flying even if you are turning. You turn in the air!
Learning how to jibe takes time, effort and patience. But there are a couple of tricks that can help you.
Read more about learning how to jibe in wing foil here.
Wing foil guide: the importance of the right gear
There are a couple of things to consider when you pick your gear. Keep in mind that your gear choice can make or break your first sessions of wingfoiling. If you pick the wrong gear, you will spend a lot of time in the water instead of on the water. If you pick the right gear, your first steps in the world of wingfoiling will be filled with small experiences of success. This motivates you as you see progress.
We will go through the biggest factors to take into consideration when you choose your wing foil set up. By considering these factors and thoroughly researching available options, you can make an informed decision when selecting your wing foil gear. Remember, the right gear enhances your performance, enjoyment, and progression in wing foiling.
Read more about wingfoil equipment here.
1. Skill level
Consider your skill level and experience in wing foiling. Beginners may benefit from larger and more stable wings, while advanced riders might prefer smaller, higher-performance wings.
Choose gear that matches your current abilities and allows room for progression as you improve.
Remember there is a lot of trade in second-hand gear so don’t be affraid to start with a beginner set.
2. Wing size
Selecting the appropriate wing size is crucial for optimal performance. Wing size should be determined based on your body weight and wind conditions.
Lighter riders typically require smaller wings, while heavier riders might benefit from larger wings. Consider the average wind speeds in your area and choose a wing size that allows you to harness the available wind power.
3. Board & foil setup
Choose a setup that complements your wing size and riding style. Foil boards come in various shapes and sizes. Larger boards provide stability and ease of use, while smaller boards offer increased maneuverability and performance.
Foil designs vary in terms of wing area, aspect ratio, and fuselage length, impacting stability, speed, and lift. Research different board and foil options to find the setup that suits your preferences and objectives.
4. Materials
Consider the construction and materials of the wing, board, and foil. High-quality materials, such as carbon fiber, are lighter and stiffer, resulting in improved performance.
However, they may come at a higher price point. Pay attention to the durability and longevity of the gear, especially if you plan to use it intensively or in challenging conditions.
5. Local conditions
Take into account the wind and water conditions prevalent in your local area. If you frequently ride in light winds, choosing a larger wing and a foil with better low-end performance can enhance your riding experience.
In areas with strong winds or larger waves, opting for smaller wings and more maneuverable foils might be more suitable.
6. Your budget
Set a budget for your wing foil gear. Prices can vary depending on the brand, materials used, and the specific equipment you choose.
While it’s important to invest in quality gear, it’s also essential to find a balance that fits your budget and offers good value for money.

The right gear helps your progress
The wrong gear makes your life very hard
How to choose between a rigid or inflatable board
The everlasting discussion between wing foilers is whether you should ride an inflatable or rigid board. While the general opinion is that a rigid board outperforms an inflatable one, the best choice is not automatically to buy a rigid wing board. It depends on your situation, level, objective and budget. Let the wing foil guide help you.
Rigid boards tend to stick less to the water, allowing for easy take-off and more manoeuvrability. They offer a more excited ride for experienced riders and they have other advantages. Inflatable boards may be the better option if you travel with your equipment, and even if you are a beginning rider. They are more forgiving and they float better on the water. They are also less painful if you fall on them.
Read more about how to pick between a rigid board or inflatable board.
Progress: How to avoid beginner mistakes for wingfoilers
You are standing on the shore, you have your wing pumped up and your board ready. You are pumped yourself too, because you want to get in the water and experience that thrill of flying! However, if you start off the wrong way, you may lose a lot of time and energy. A very commonly made mistake is to start off with not enough wind. This is because in windsurfing, people learn to start with low wind. In wingfoiling however, it’s actually easier to start with a nice breeze that gives you power in the wing.
And there is more. That is why we have this comprehensive guide to avoid beginner mistakes for you.
Learn how to have a successful session by avoiding these 5 beginner mistakes.
- Starting off with the wrong gear
- Not knowing how to control your wing
- Not standing on your board in the right position
- Starting overpowered or underpowered
- Having poor board control
Want to know more? See our full guide to avoid 8 beginner mistakes!
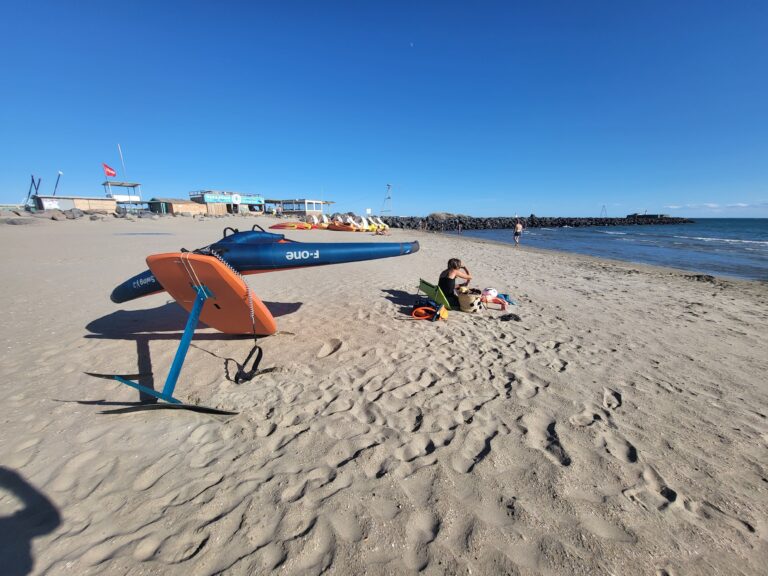
Travelling with your wingfoil: go anywhere!
One of the great aspects of wingfoil (and kitesurf, yes) is that you can travel with your equipment easily. Especially if you travel by car, and you have an inflatable board, you just stuff your gear in the trunk and off you go. You do not need any equipment stored on a rack on the roof, or even on the backseat in your car.


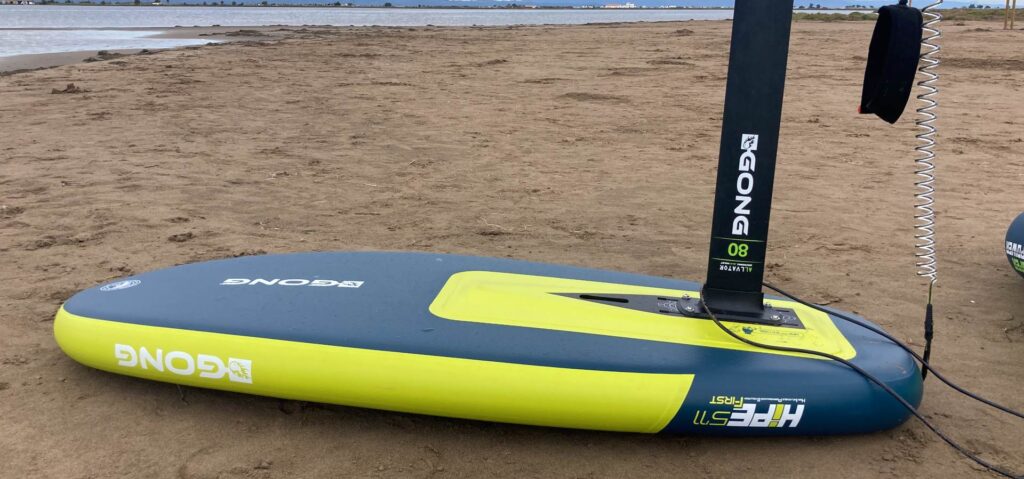
Above, you see a full set of wing foil equipment. A big 165 liters inflatable board (which is very large, normally people use smaller boards as soon as they get on the foil), a 5 meter wing and an XL foil of the brand Gong. You can see it all fits in the trunk of a mid-sized car easily. This enables you to bring your gear on any road trip. Even a hand luggage size suitcase with your normal travelling luggage fits with it in the trunk.
Check the travel tips with wingfoil equipment for more tips about traveling with airplanes and other public transport.
Wingfoil guide: how to carry your gear on the beach and into the water
In the beginning, your new set of wingfoil gear seems to consist of a lot of different things: you have your board, your foil, your helmet, your wing, your leashes and so on. How do you carry all this to the water, into the water and out of the water without damaging it?

There are different ways and techniques of carrying your wingfoil gear on the beach, to the water and into the water.
You can carry the board with the foil resting on your shoulder like in this picture, but you can also decide to carry the board by using the grip that’s typically located in the bottom side of the board, just in front of the foil.
In general, you want to make sure the foil and the wing don’t touch each other. The foil is a sharp element and it will puncture the wing easily. Luckily, you can avoid this by reading our handy guide on how to carry your gear here.
Safety tips for wingfoil
Remember, safety should always be a top priority in wingfoiling. Wing foil is an absolute thrill, like almost no other sport. The feeling of flying over the water and the combination of wind, waves and your technique makes it truly unique experience. But because it’s a water sport, safety is of importance. By following these safety tips and continuously educating yourself on safe practices, you can enjoy the excitement of wingfoiling while minimizing risks and ensuring a memorable and secure experience on the water.
Here are three safety tips already for you.
- Use the right gear, at least a helmet, impact vest, wetsuit.
- Be aware of your surroundings and let somebody know that you are going out.
- Start in a safe environment: a lake or a flat area of the sea, where you can easily get in and out of the water and there are no waves.
Before your first session, read this practical guide with 10 safety tips for wingfoiling.
Riding heelside and riding toeside
In wingfoiling, mastering the art of riding heelside and toeside is essential for expanding your skills and enjoying a dynamic riding experience. Both riding styles offer unique challenges and benefits, and being proficient in both is key to becoming a well-rounded wingfoiler.
Toeside riding, on the other hand, involves facing the front of the board and using your toes to steer. This position allows for more agile turns and maneuverability, making it ideal for carving through waves or executing quick changes in direction. Riding toeside requires a higher level of balance and body awareness, as you’re facing against the wind, and it may take some time to get comfortable with this riding style.
However, mastering toeside riding enhances your wingfoiling versatility, enabling you to tackle a broader range of conditions and fully embrace the thrill of wave riding.
Heelside riding involves facing the back of the board and using your heels to control the board’s direction. This position offers increased stability and control, making it an excellent choice for beginners or when navigating challenging conditions. Riding heelside allows wingfoilers to maintain a steady balance, particularly in choppy waters or during gusty wind conditions. It also facilitates smooth carving turns and helps with maintaining proper wing positioning for optimal power.
Ultimately, being proficient in both heelside and toeside riding gives wingfoilers the flexibility to adapt to various wind and water conditions. As you progress in your wingfoiling journey, honing your skills in both styles will help you find balance and harmony on the water, elevating your wingfoiling experience to new heights. Embrace the challenge, explore both riding positions, and unlock the full potential of wingfoiling’s dynamic and exciting world.
Read more about toeside and heelside riding.
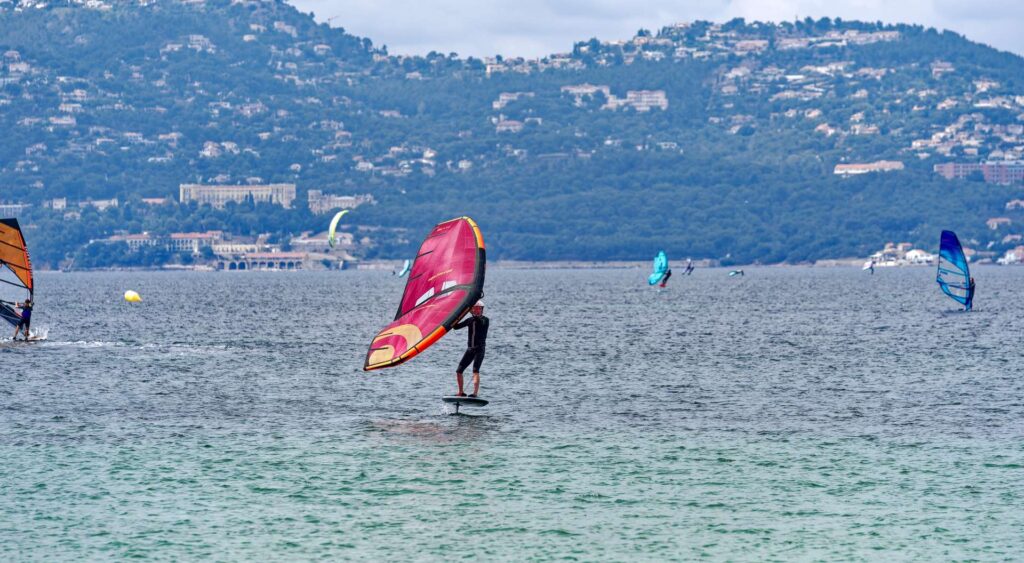
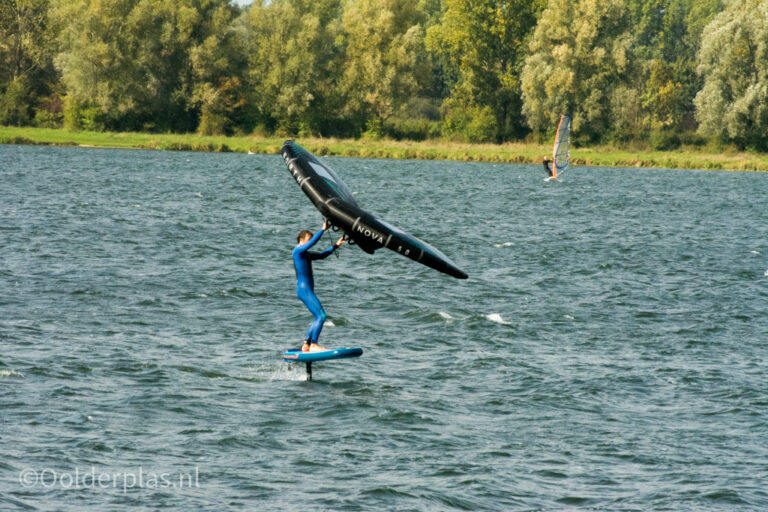
Riding in low wind
In wingfoil, you don’t need as much wind as you would need for kitesurf or windsurf. This enables you to have much more sessions as with lower wind you can get in the water as well as you can with stronger wind.
You can actually start flying from as little as 9-10 knots once you have the right pumping technique in your system. If you’re not an expert pumper, you can probably get on the foil from 12 knots up. Depending on your level, foil and wing size and your board, this should be doable after a couple of sessions.
What you lack in capacity you can make up for in size. If you’re a beginner and you want to fly with low wind, but you don’t know yet how to pump, you can get an XXL foil. This will allow you to fly at low speed. Flying at low wind speed has an added advantage which is that there normally are less waves, and it allows for you to make more hours. More hours means more experience which brings better surfing level for you.
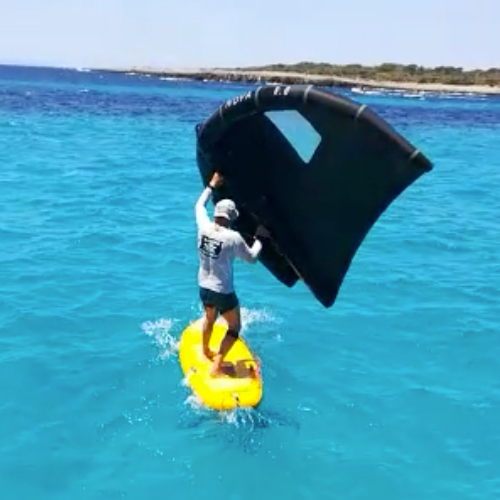
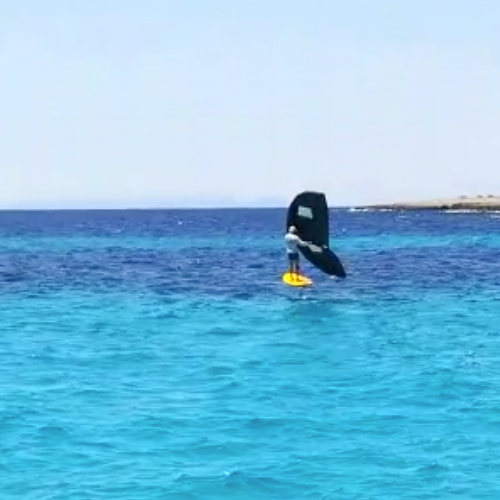
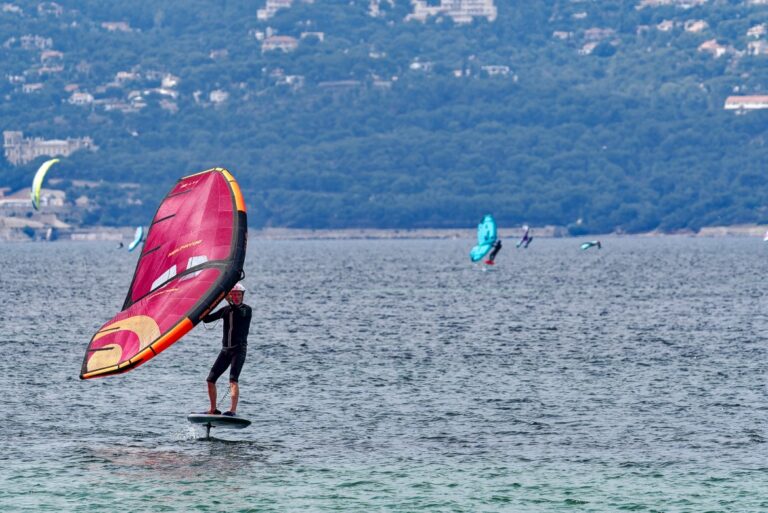
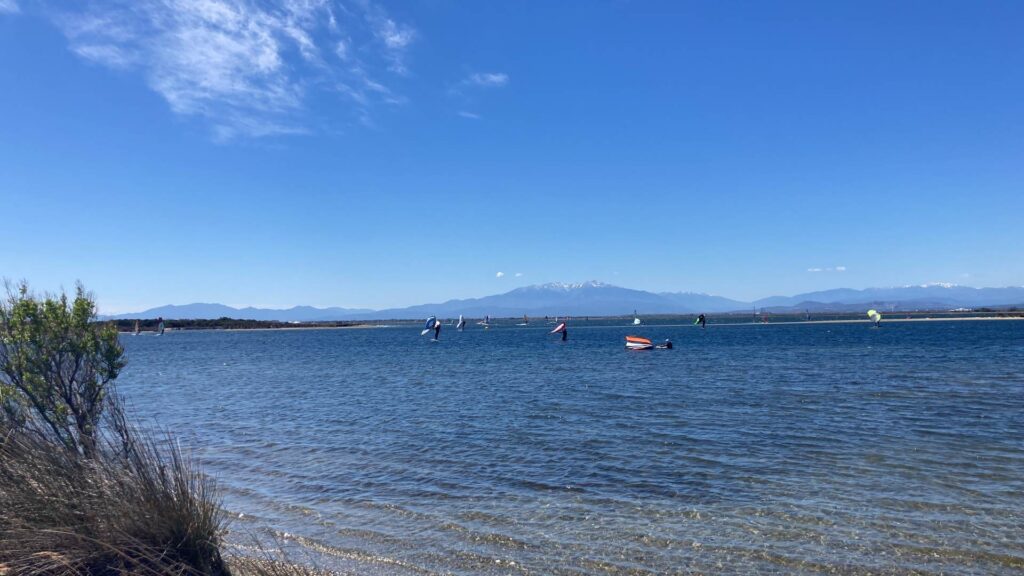
In the picture below, you see two wingfoilers flying and having a great time. The windsurfers have their sails straight up, meaning they are not planing over the water. This shows how wingfoilers don’t depend as much on strong winds as windsurfers, thereby enabling wingfoil riders to ride more often.
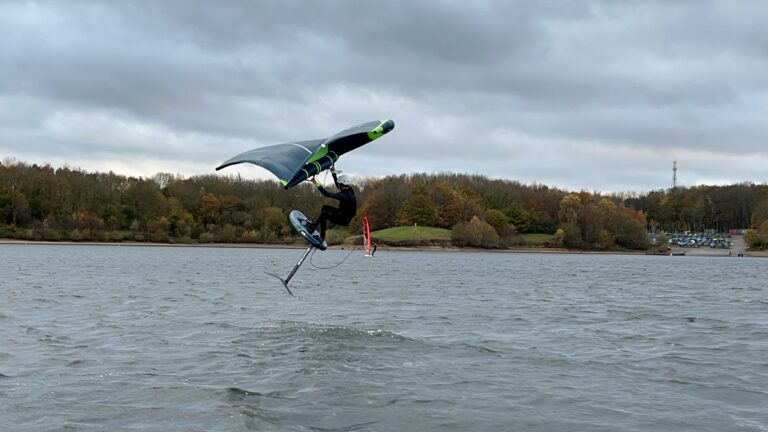
Riding in strong or gusty winds
One of the things that makes wingfoil so cool, is the fact that you can ride in a big variety of wind force with a single set of gear. In example, if you weigh 88 kilos and you ride on a 135 liters board, you can probably ride from 12 to 20 knots with a single wing of 6 meters. Obviously, this depends on a set of factors like your level, the waves, the configuration of your board and foil, and the rigidity of your wing.
But in general, you can say that wingfoiling offers you a lot broader wind range per set of gear compared to windsurfing.
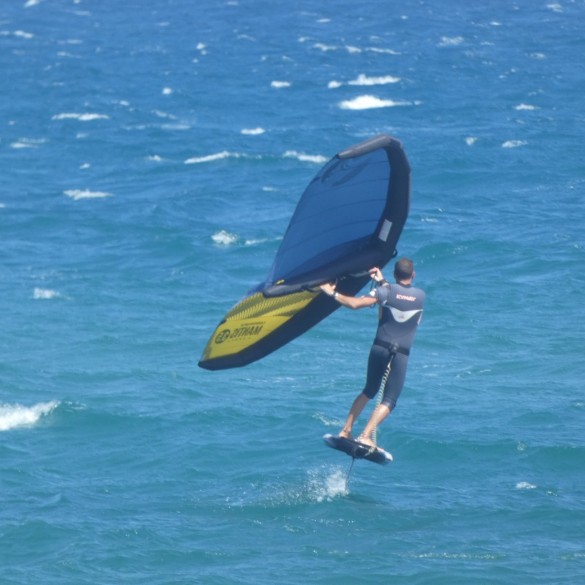
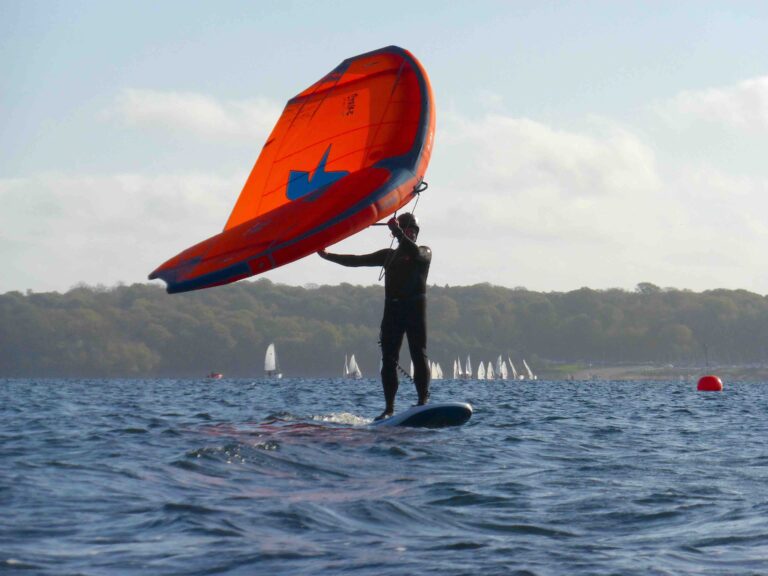
If you ride with gusty wind, you don’t necessarily have to modify your gear configuration and get a smaller wing. When a gust comes, what you can do is just lift up the wing above your head. The most power of the wind will go underneath the wing, as you see below on the picture. Once the gust passes, you move the wing back in a more vertical position. That way, you re-power the wing.

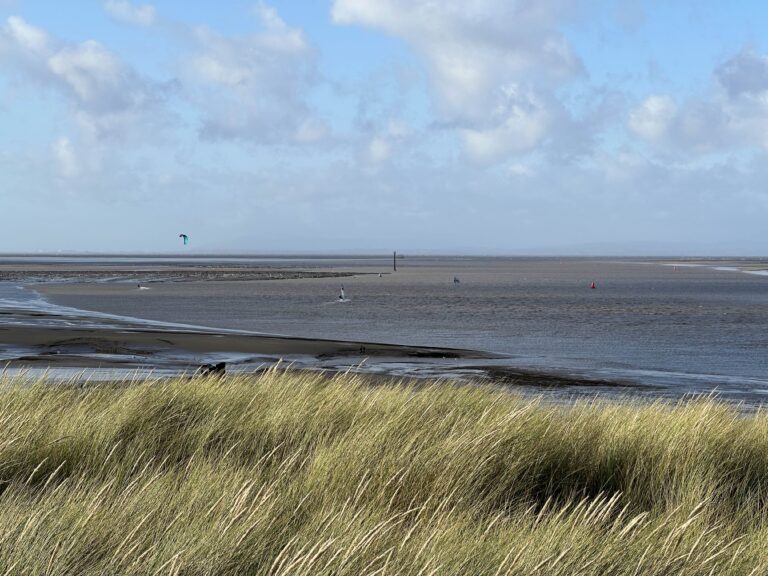
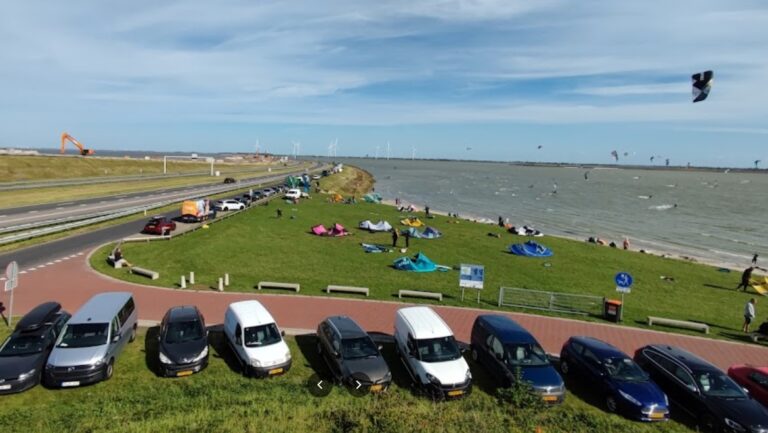
Wing foil guide for where to go wingfoiling
One of the great benefits of this sport is that the equipment is easy to carry in your car when you travel. Especially when you have an inflatable board, it’s not a problem at all to bring your stuff along in your trunk. This opens up a lot of options when it comes to discovering new spots to ride.
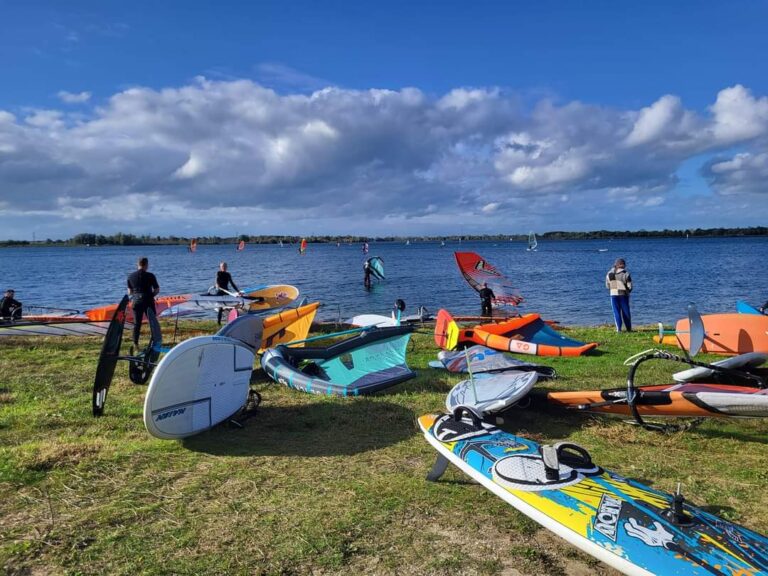
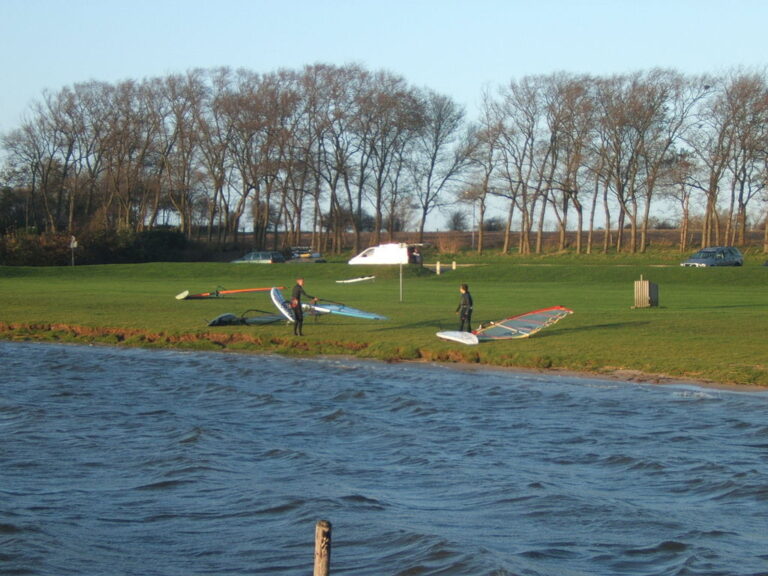
On the wingfoil spot finder we create a database for everyone to discover the best spots for all levels of riders. There are tons of great locations and hidden gems to be discovered! Here you see three of them, scroll through them and see more! The spot finder is your ideal wing foil guide on the road.
You can also upload your own spot and share it with others!


Gadgets for wingfoilers – wing foil guide
The world of wingfoiling is in full motion: new materials, new equipment, new technical insights and new gadgets come up regularly.
That’s why this wing foil guide is so handy. For those who are in to gadget, this sport offers a lot of fun too. There are many gadgets that can make your life easier as a rider.
You have wetsuit dryers, electrical wing pumps, changing poncho’s, roof carriers, dry bags, surf sunglasses and so on.
See more wingfoil gadgets here.
Here are already 4 top wingfoil gadgets for you: